I have a new online course out in August on Special Effect Glazes. This course builds on my How Glazes Work online course. In the new course I demonstrate how to make and adjust volcanic glazes and talk about the chemistry behind special effect glazes: crater, crackle, crawl and crystalline glazes.
What you will learn:
Demonstration
How to mix glazes, analyse fired glaze tests and adjust glaze recipes to get the results you want. The practical demonstration will focus on volcanic glazes. You will need to buy the materials soda feldspar, kaolin, strontium carbonate, titanium dioxide and fine silicon carbide and make and biscuit fire 10-20 test tiles if you want to make the glazes yourself.
Lecture
Glaze chemistry
1. The three main components of a glaze and what each material contributes to the glaze.
2. Glossy and matt glazes.
3. Glaze defects/special effects.
4. Different types of special effects; crackle, crawl, crater, crystal, oilspot and metallic glazes. Health and safety.
The course is suitable for intermediate potters and ceramicists. It helps if you have already done my previous course on How Glazes Work. The course covers a lot of material condensed into a short demonstration and lecture. I cover the same material that I teach on my two-day in-person special effect glazes course. The special effect glaze recipes will be given in the course download. Further recipes are available in my book Special Effect Glazes.
To join the course, just join my membership. My course on How Glazes Work is also included. The Special Effect Glazes online course will be launched on 12 August 2025. You can watch the videos any time during the next year.
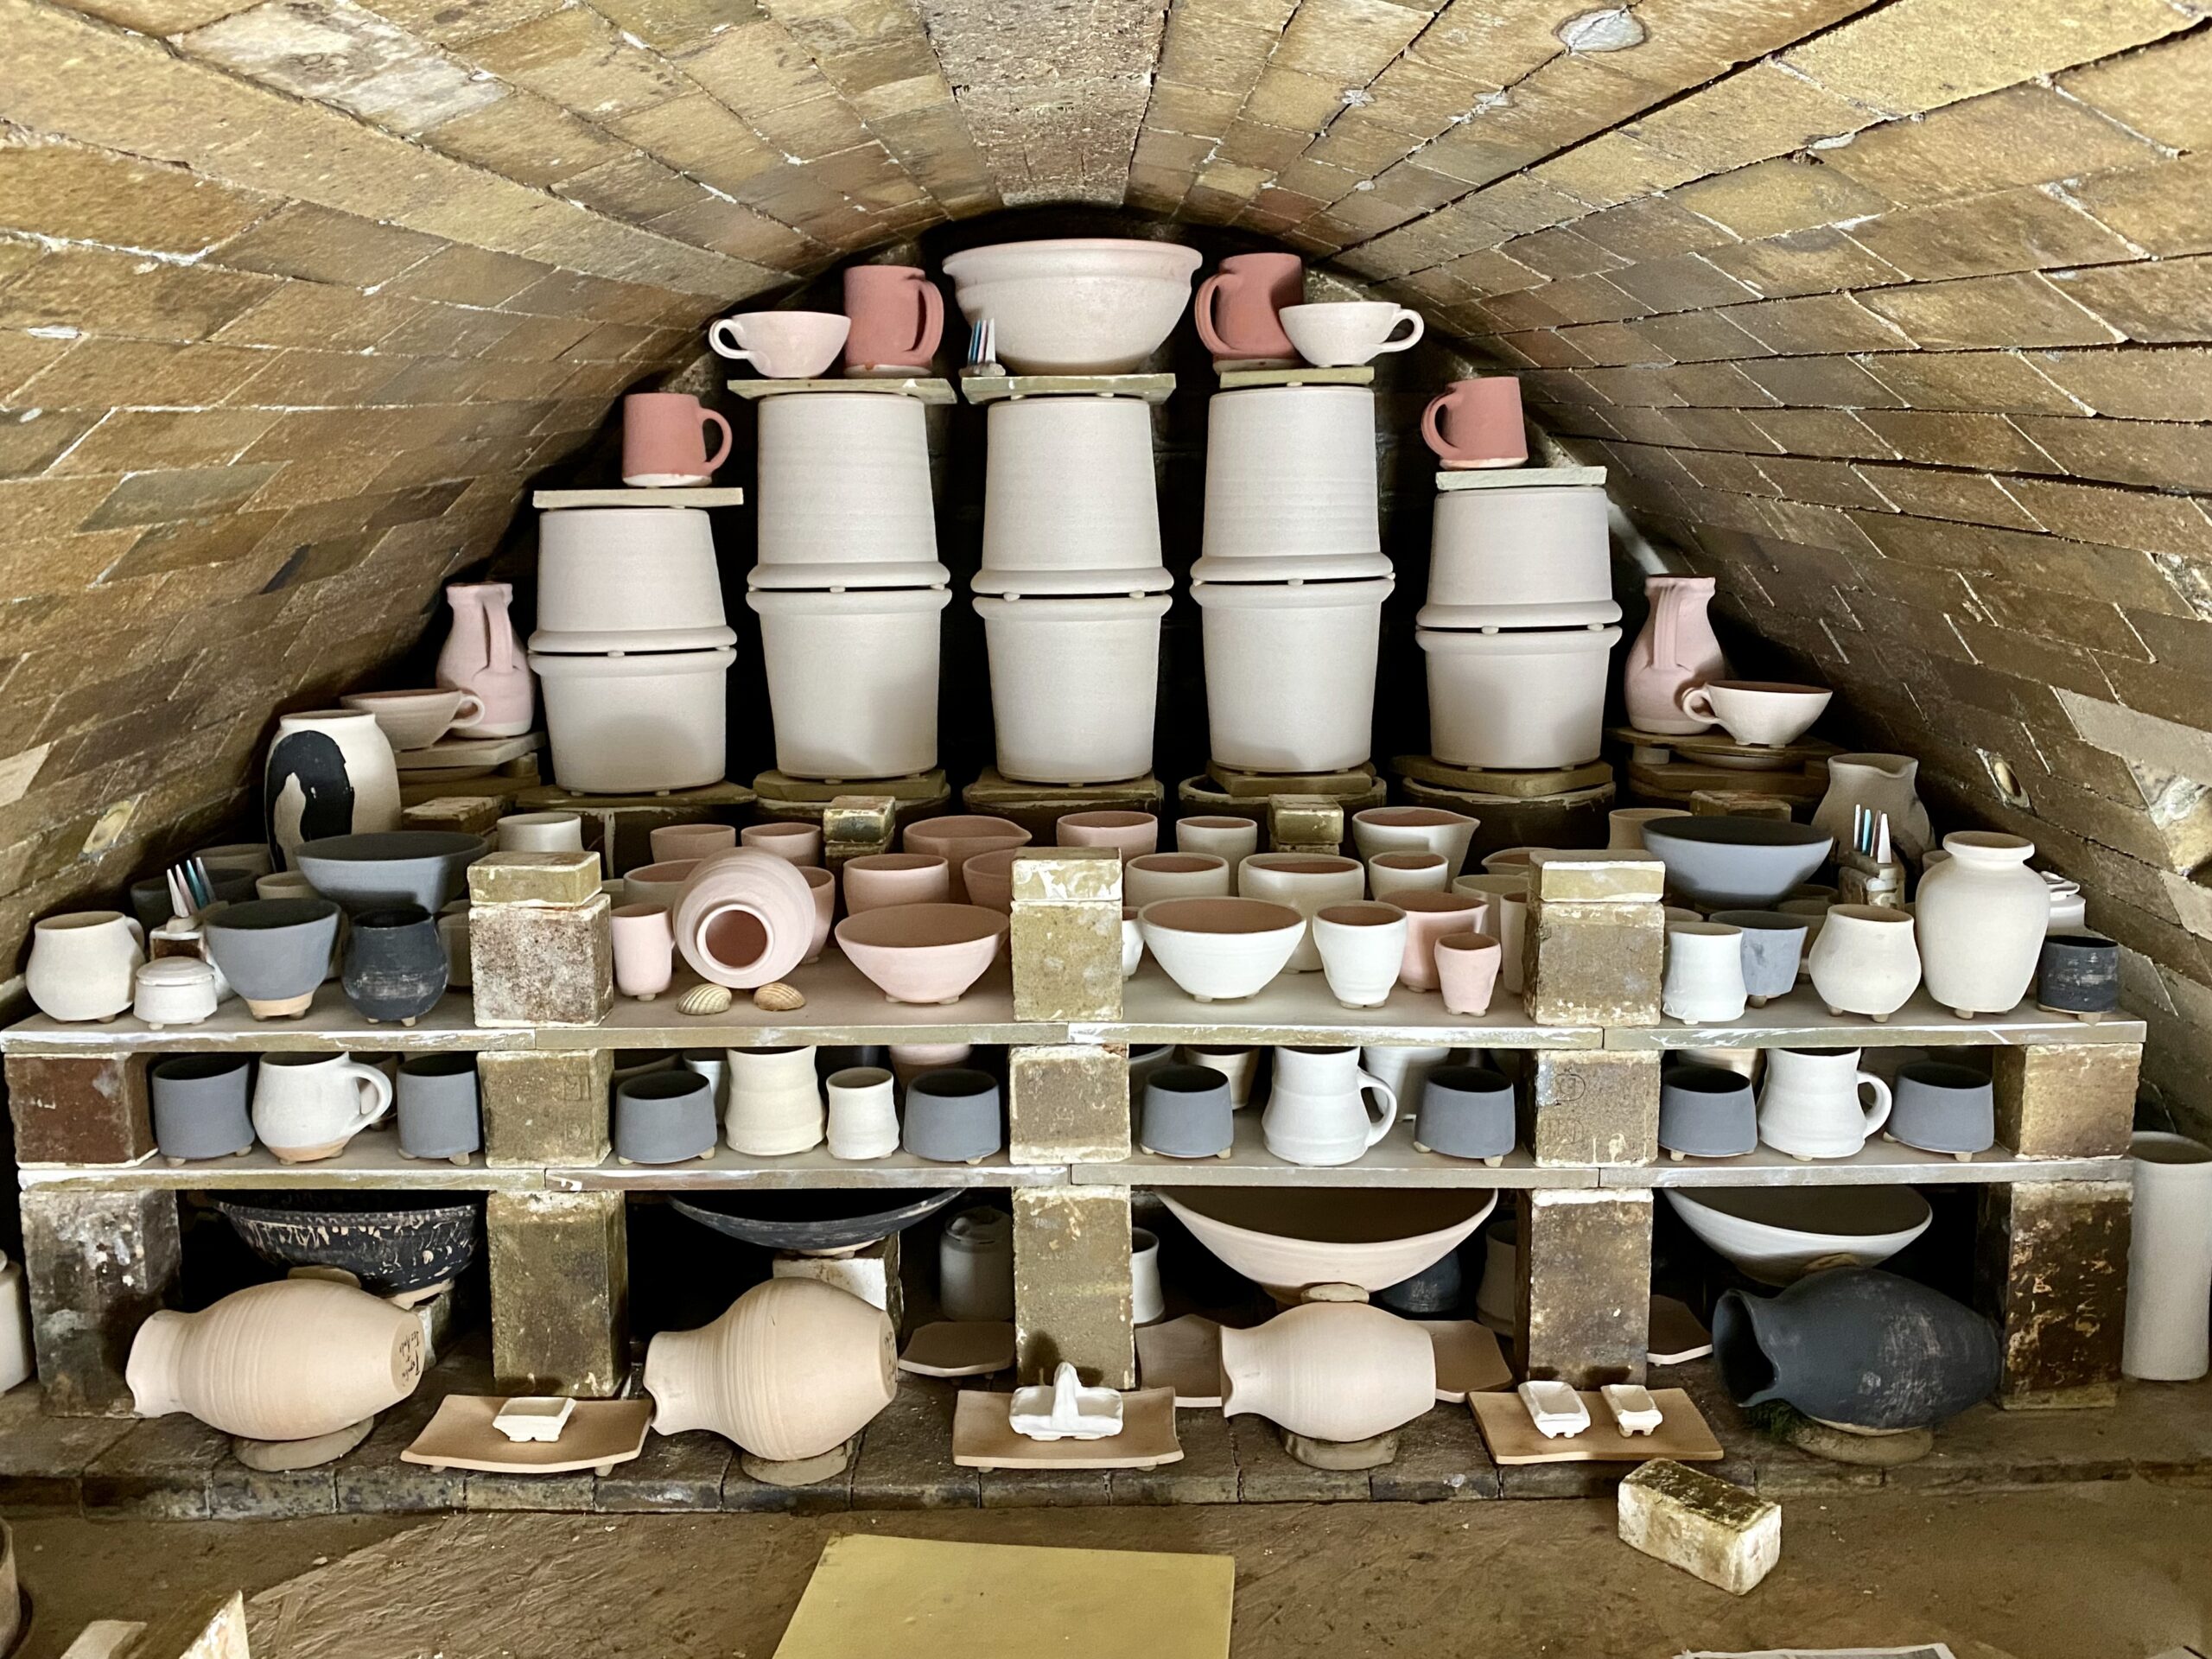
Recently I took part in a wood firing at Kigbeare in Devon. The firing took five days and involved seven potters. We each took 4 hour shifts, with 8 hours off in between. I did shifts with Deborah Mitchell who had fired the kiln before. First we stoked from the front of the kiln and later from the sides. Unusually, the anagama kiln designed and built by Svend Bayer has five sets of side-stoking ports, one on each side between each stack of pots, so that it’s easier to get the back of the kiln up to temperature. We used oak, ash and pine wood cleared from the nearby golf course and started reduction by closing the damper at 800 C, maintaining reduction all the way up to the top temperature around 1280 C when cone 12 stared to bend.
My celadon glazed porcelain pieces were on two shelves in the middle of the stack near the back of the anagama. One of my vases was placed on its side resting on cockle shells. The other pieces were placed on balls of wadding made from china clay mixed with alumina so that the melted wood ash from the firing would not stick them to the kiln shelf. I shared the stack with Poplini and Jezando and Jessica Mason. The pots at the back of the kiln are by Charlie Collier.
Rebecca Proctor side stoking the anagama. The flames coming out at the top show there is good reduction.
My porcelain pots unloaded from the kiln with some of Jessica Mason’s pots on the far left. Mine are glazed with celadon and satin matt white. The good reduction throughout the firing caused the celadon to come out a lovely pale blue. Some of the pots stuck to the wadding but I managed to grind them off. There were hints of orange flashing on the bases of pots where the soluble salts carried by the flames reacted with the clay body. It was a very successful firing for all the potters.
I am now midway through my residency at Guldagergaard. We had a busy week firing two of the wood kilns. Ana, a Spanish artist and I got up early and started the fire at 5am. The pyrometer wasn’t working so we had no idea how quickly the temperature was rising, although we could see an orange glow inside the kiln. When the wood firing technicians arrived at 9am and put in a new thermocouple, we were amazed to find we had already reached 1100°C, a very fast increase in temperature indeed, so we were lucky that nothing had cracked. We had to let the temperature drop to 1000°C to do body reduction by adding hardwood, closing the dampers and restricting the air intake for an hour.
Firing the Speedy soda kiln
When we reached 1280°C Ollie the wood firing technician sprayed in a solution of soda ash in water. The soda reacts with the silica and alumina in the clay to produce a glossy glaze. We soaked the kiln at top temperature for several hours to even out the temperature between the top and bottom of the kiln. Ollie sprayed soda again and we finally put in more wood and closed up the kiln so that the glazes would be in reduction.
Ollie spraying sodaGlaze results
The next day we fired the Bourry box train kiln. This is a slightly larger kiln that encourages effects from wood ash falling and melting on the pots and flames from the burning wood flashing the surface orange.
Cones 8,9,10
The results were much more matt and crusty where wood ash and embers had fallen onto the pots.
Cone 8 and lichen effect glazes
I was very happy with some of the results but surprised by some of the glaze colours that had changed owing to the effects of reduction. My mustard yellow glaze turned black and my dark green lichen glaze turned blue-green.
I am a week into my month long residency at Guldagergaard International Ceramic Research Centre in Skaelskor, Denmark. There are several artists in residence here and new potters coming every week to attend workshops and wood firings.
Guldagergaard
I have been trying out a variety of grogged and flecked stoneware clays and making test pieces to fire next week in a wood kiln. I am using an Australian Venco wheel with a wireless Bluetooth pedal. The studio space is very well equipped with a glaze room, drying cupboard, mould making and slipcasting rooms as well as electric kilns.
Glaze room
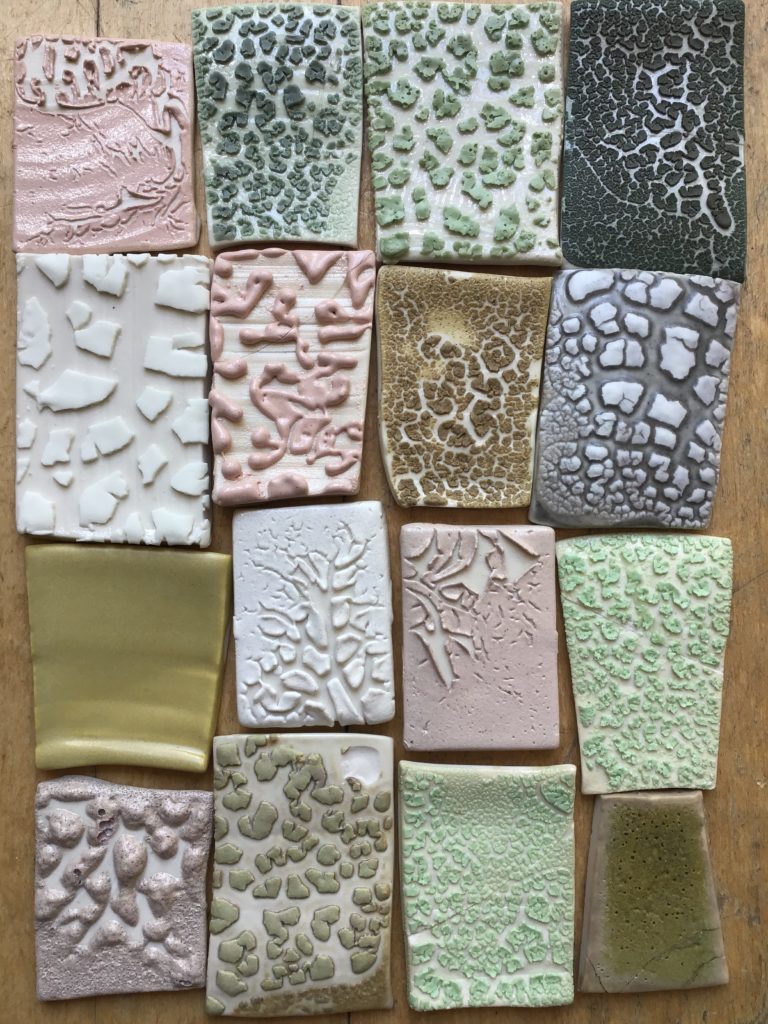
I have also taught a special effect glazes workshop where we made a range of lichen, lava, oilspot, crackle, gloop and metallic glazes.
Lichen effect glazes
Thank you to the Making Waves Trust for providing me with a grant.
I have been making new work for Collect, the international art fair for exceptional craft and design presented by the Crafts Council. This year Collect will be online on Artsy from 26 February to 26 March. I will be exhibiting with Design Nation, along with other makers of ceramics, jewellery, furniture and textiles. I was inspired by lichens seen on a walk to the post office. I have made a video of my walk:
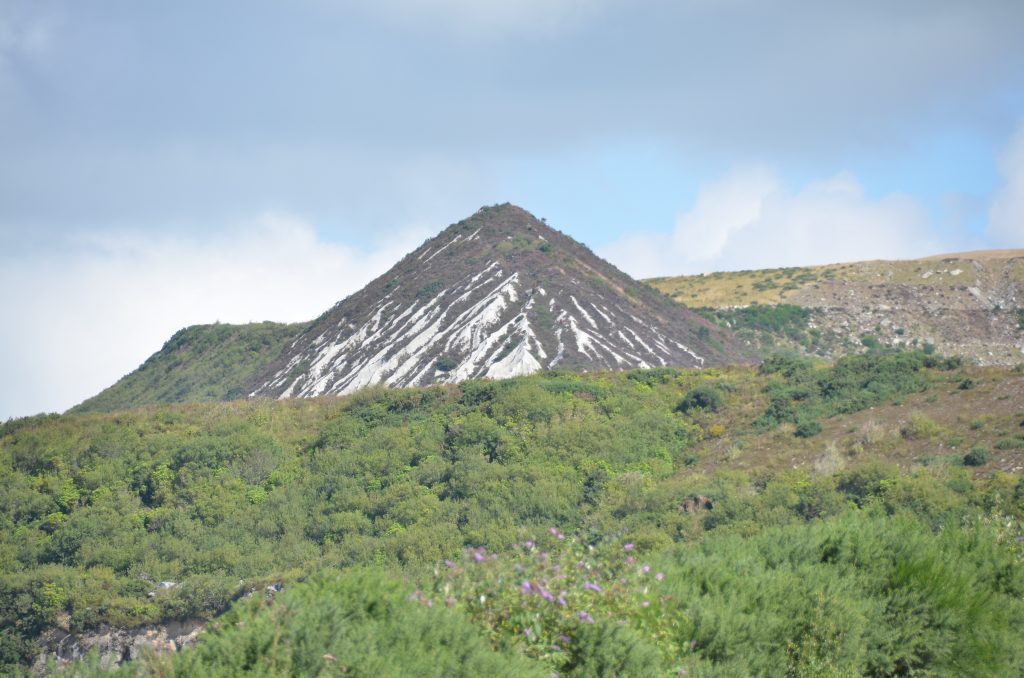
Studio potters often worry about the large amount of energy they need to fire kilns to a high enough temperature to produce their ware. In addition, the materials they use, clays and glaze ingredients, are dug from the earth and are not renewable. However, with the exception of pure, white kaolin, clay is very common worldwide, the result of weathering and crumbling of mountains, the sticky residue deposited in rivers and lakes over millions of years, part of the geological cycle which could be seen as long term, natural recycling.
China clay spoil heap in Cornwall
Many glaze materials are also common, including quartz, limestone, feldspar and iron oxide, a colourant that has been used since the earliest pottery. However, some of the colouring oxides including cobalt are rare, expensive and difficult to mine and occur in areas of the world where unethical practices take place.
It is really important to learn as much as you can about your materials, where they come from, how they are mined, what they are composed of and what each material is used for; clay, flux, glass former, stiffener, opacifier or colourant. When recycling ceramics, the clay and glaze waste need to be separated. If this is not done, the fluxes in the glaze may cause the recycled clay to warp and slump during firing.
Emptying the clay trap
Fortunately, there are several things we can do to make our pottery studio practices greener. Studio potters only use only a fraction of the materials and energy used by the ceramics industry, but together we can try to change the ways things are done and make our voices heard. I wrote a list for the Crafts Council of eight ways to make your studio pottery greener.
‘Climate change and air pollution are two of the biggest challenges facing the world today.’
Michael Lewis, E.ON UK Chief Executive
1. Use a green energy provider generating power from the sun, wind or water. Green energy can be used to fire electric kilns. For wood firing, make sure you use wood from a sustainable source or offcuts from woodworkers. To make firing economic, make sure the kiln is packed as full as possible every time you fire and consider reducing firing temperatures or firing times. Avoid breathing firing fumes by firing at night and ventilating the studio well.
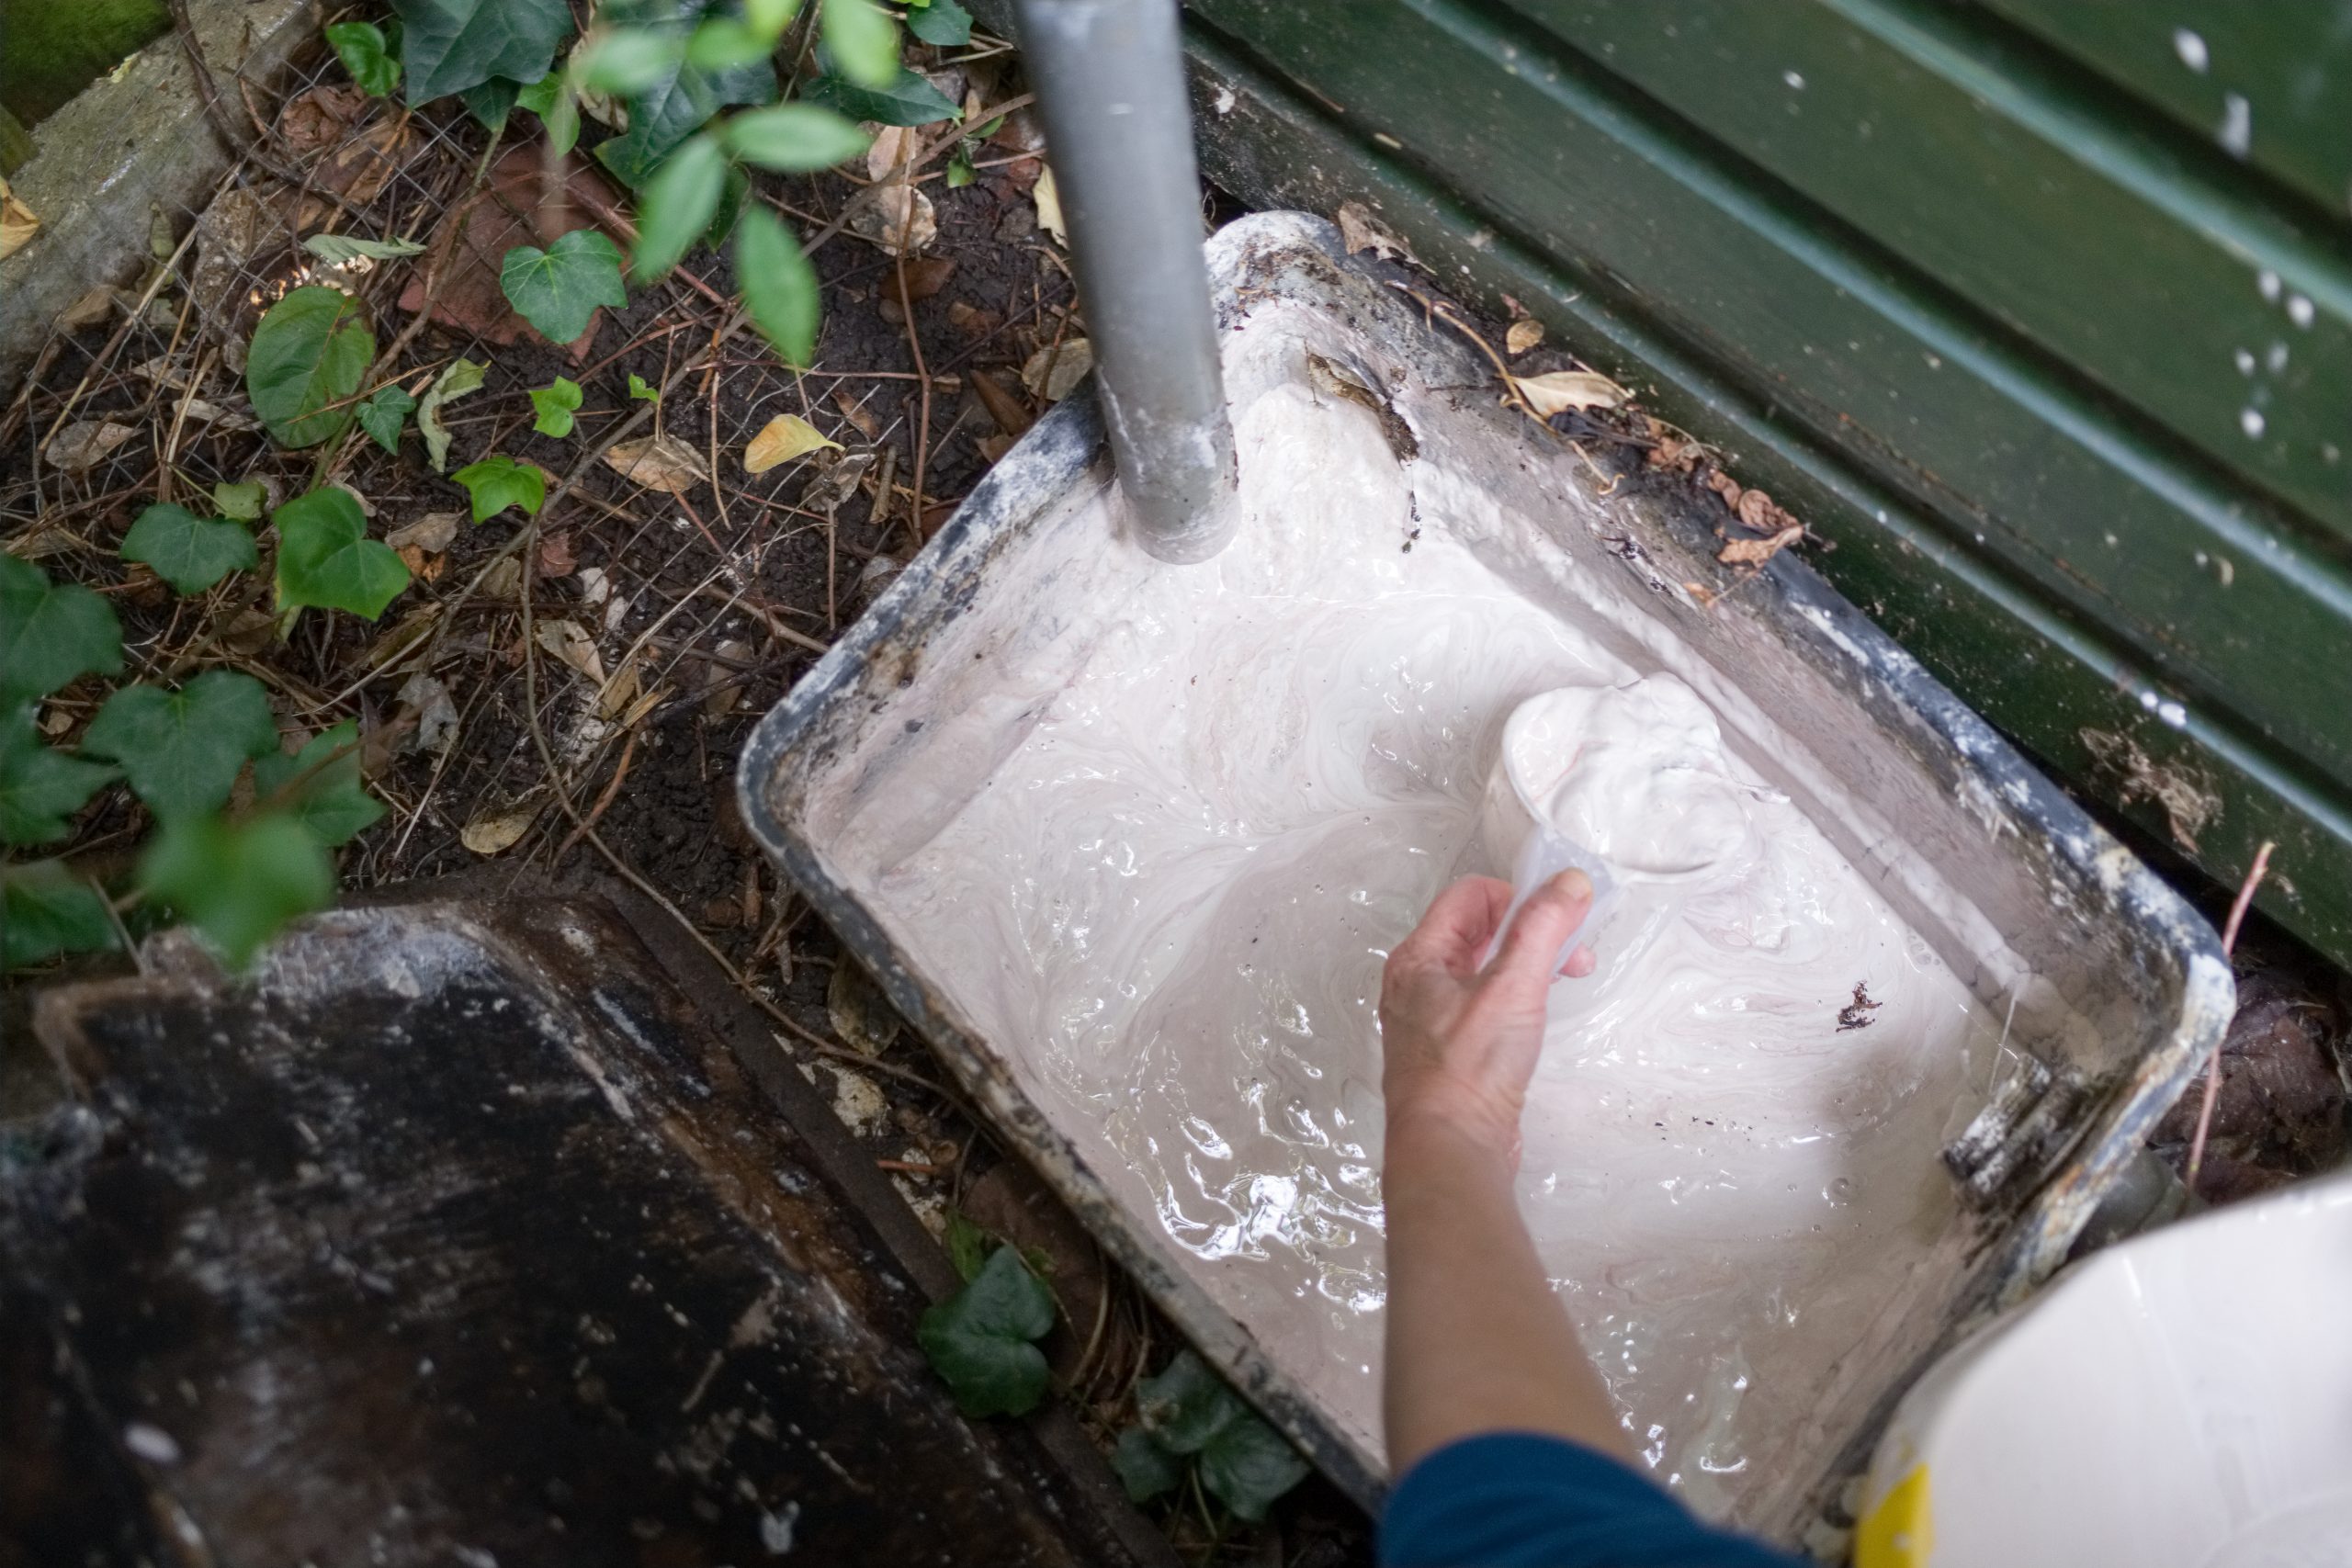
2. Recycle all unfired clay. Collect together failed pots, throwing slurry, trimmings and turnings. If they are still in the wet state, wedge them together by combining into a large mass, cutting in half and slamming the two halves together repeatedly. If the clay has gone beyond leather hard, dry out until completely bone dry and then add to water to allow to slake down, leave to settle, then pour off excess water and dry out the slurry on a plaster batt to a workable consistency. Wedge and knead well before using.
3. Collect all clay washed down the sink in a settling tank, then recycle the slurry. Keep a separate bucket of water in the glazing area in which to wash hands, brushes, sieves and glazing tools, leave to settle overnight, pour off the water, then collect the settled glaze at the bottom and re-use. If you don’t separate the clay and glaze in this way, you will end up with a mixture of clay and glaze in the settling tank, which is more difficult to recycle.
4. Recycle excess glaze. Either wax the bottoms of pots to avoid glaze sticking, or scrape off glaze from the base using an old credit card, collect the scrapings and when you have enough, add to water and sieve. Overspray glaze from spray booths can also be collected. You will need to keep each glaze separate. Alternatively, you can collect all glaze scrapings together into one bucket, sieve and use as an ever evolvingmystery glaze, or add iron oxide to make a more consistent black glaze. If you must throw away glaze, leave to dry out and dispose of the solids in landfill, not down the drain.
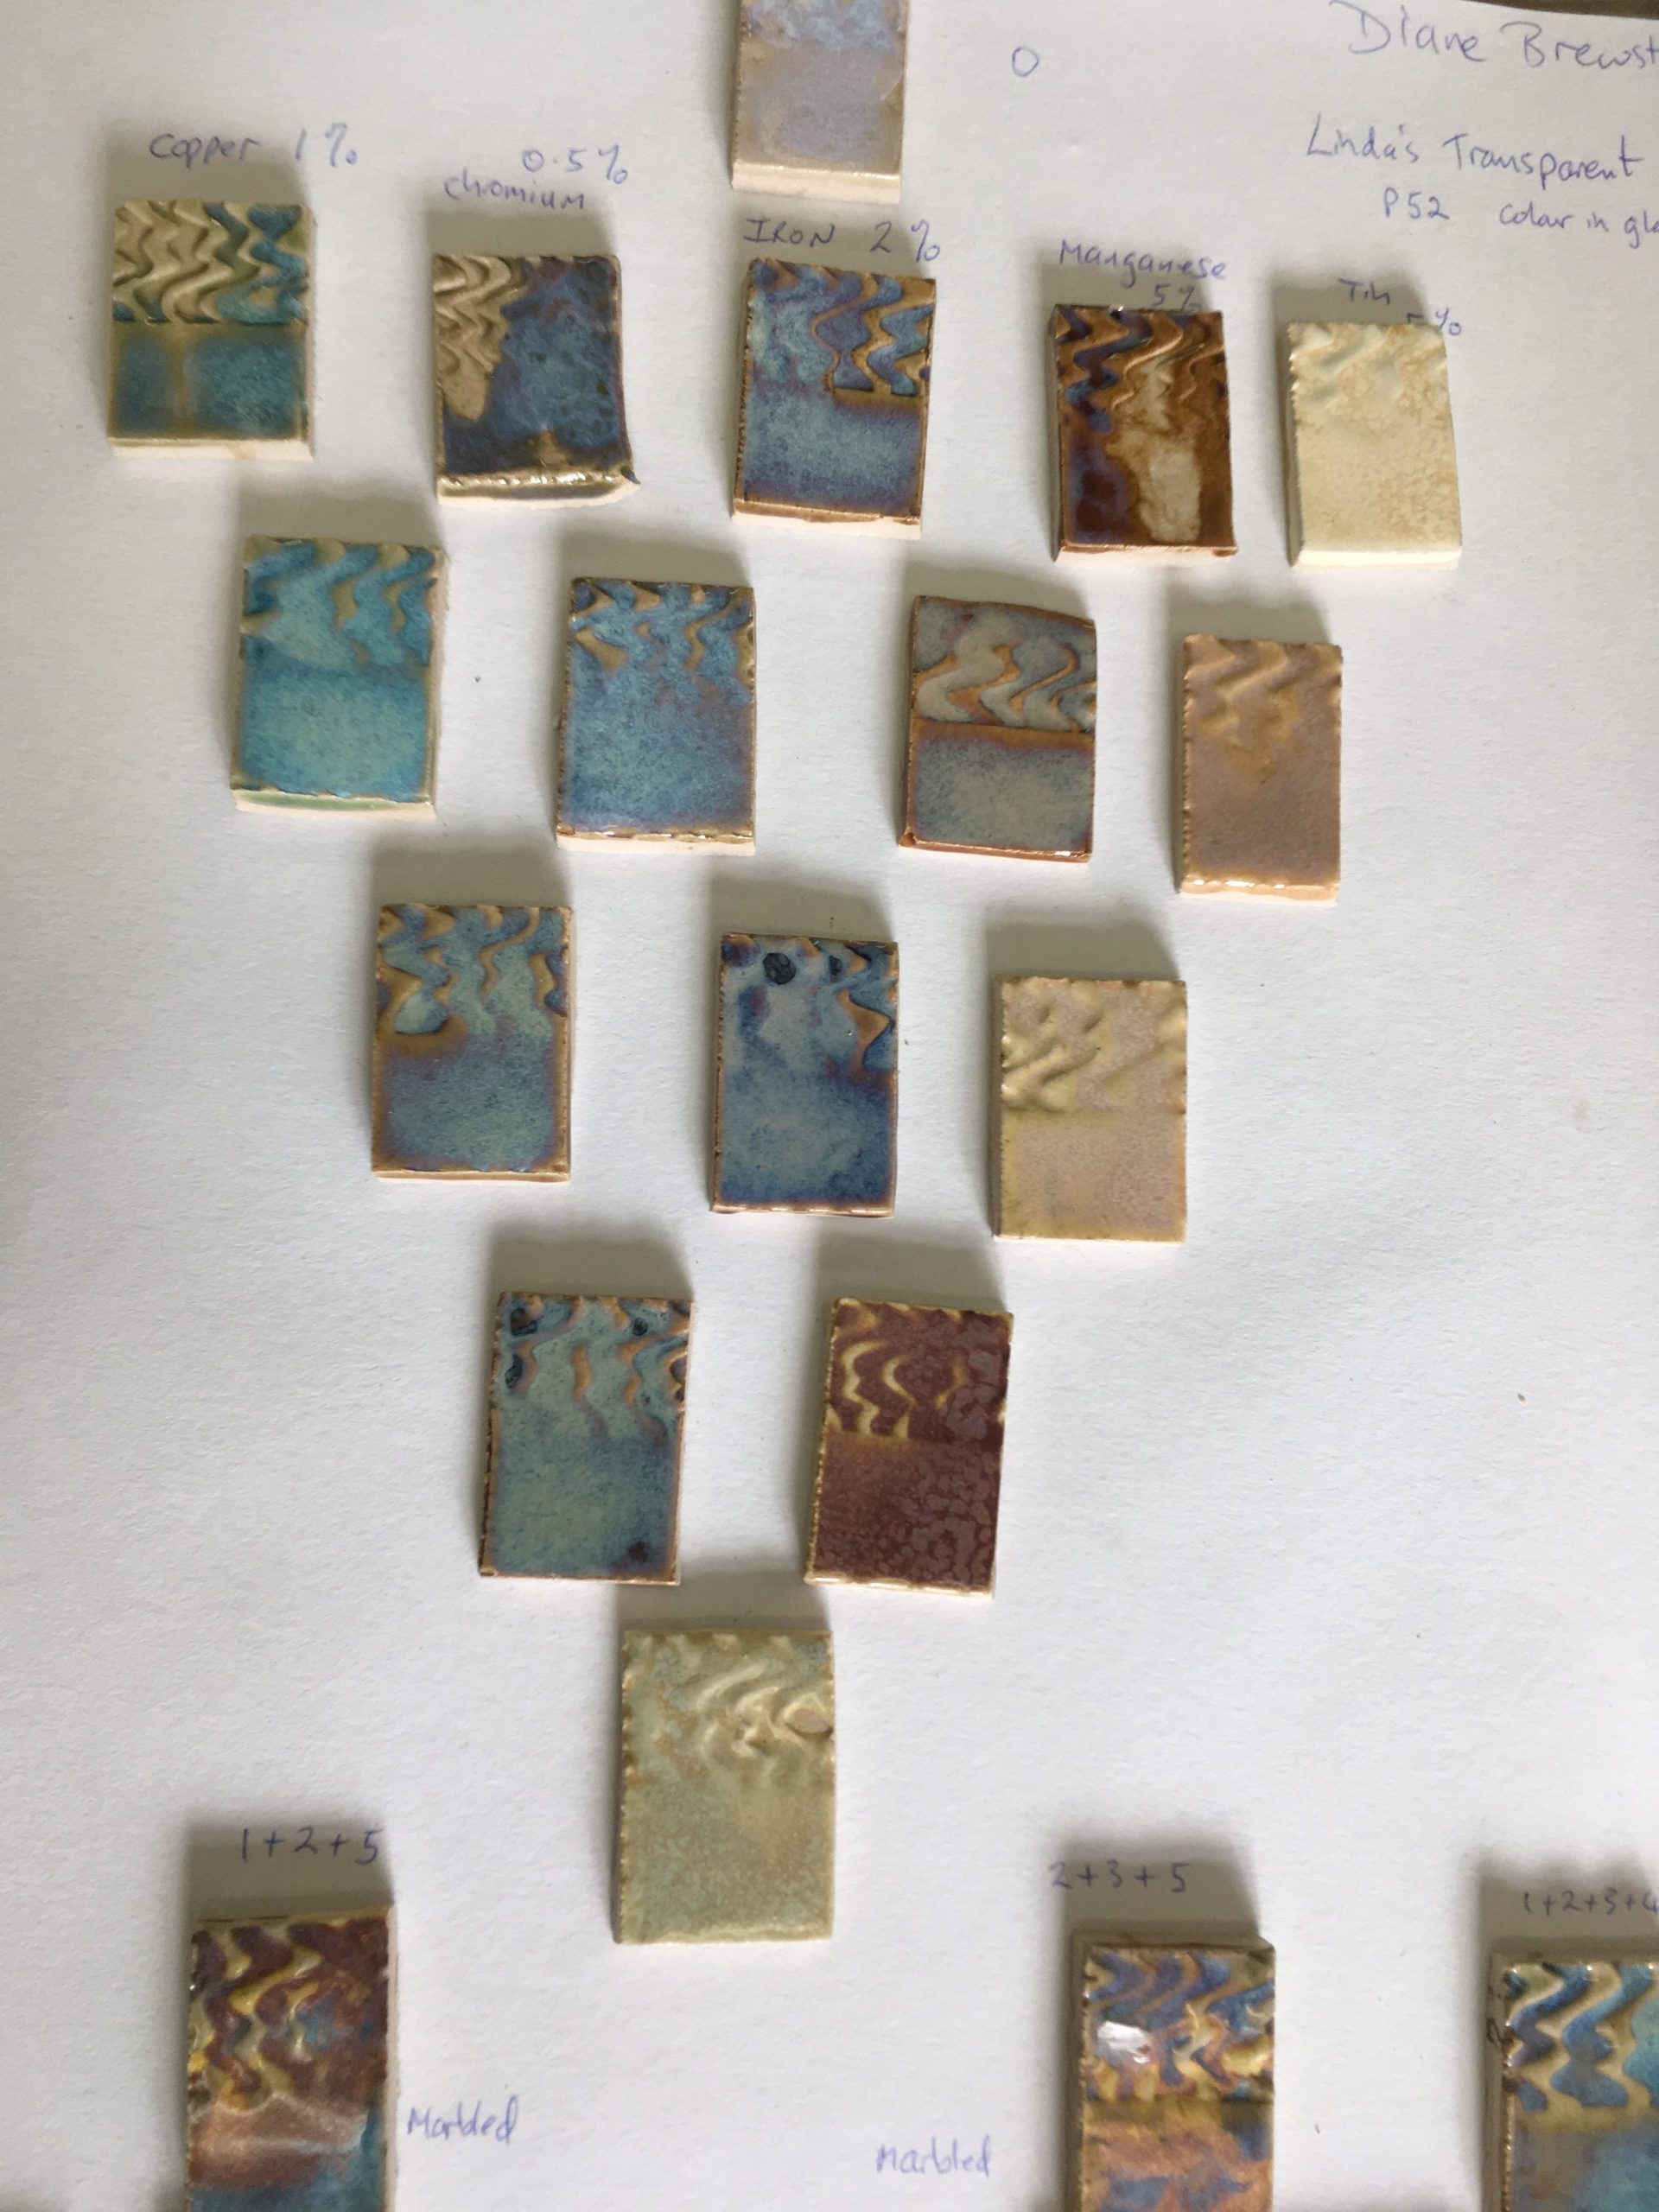
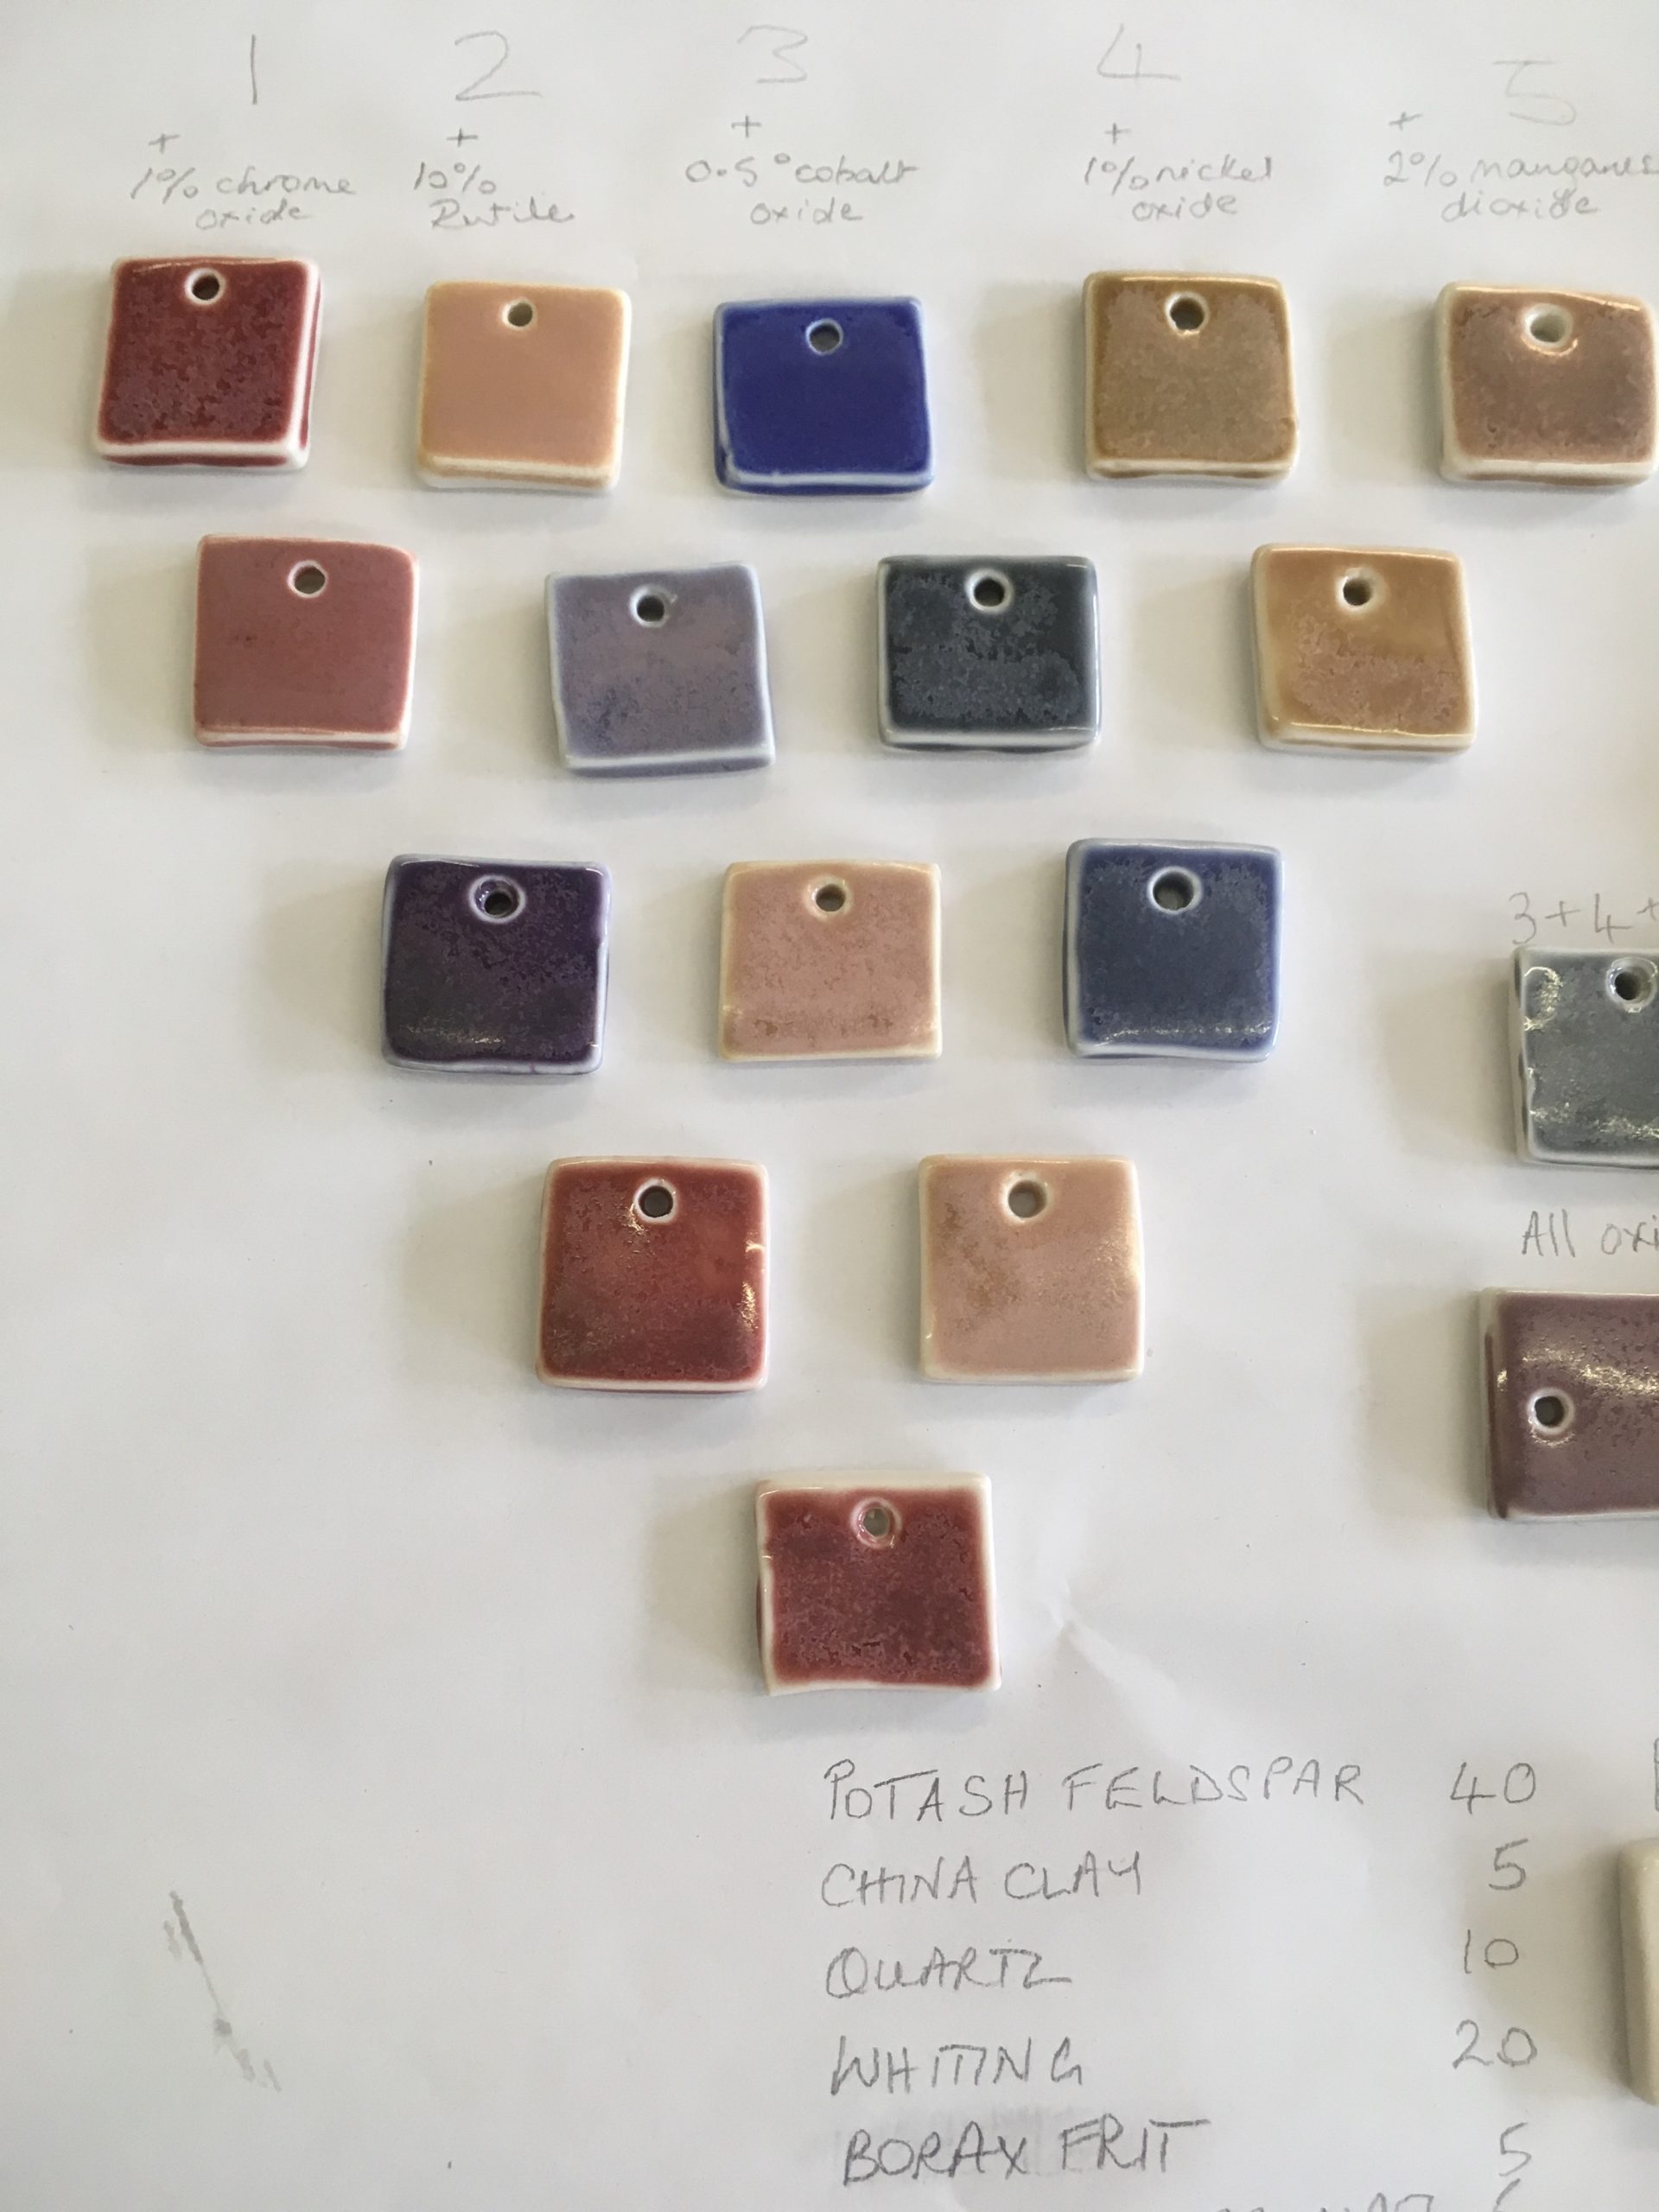
5. Avoid using toxic glaze materials, including lead, barium carbonate (use strontium carbonate instead), chromium oxide and nickel oxide. Black clays often contain manganese dioxide and you should avoid breathing in the dust or firing fumes from this. Ask your supplier whether your cobalt comes from an ethically mined source and if not, consider using other colouring oxides instead. Iron oxide is the most widely available and non-toxic colouring oxide and gives colours from amber, through rust red to black.
Richenda Macgregor and Mel Chambers of Studio45 in Dartington, Devon advise
‘We only used non-toxic glazes at Studio 45 and ensured the firings were done at night to avoid any fumes in the studio during the day whilst people were present. The main thing was the large extractor fan built into the wall to draw out any fumes but as I say it wouldn’t have contaminated anything as they were non-toxic.
My best advice is to research non-toxic glazes and stick to those then everyone is happy.’
6. Save shards from broken pots and give to a mosaic artist or use as crocks for drainage at the bottom of flower pots. It is possible to recycle broken ceramics to make new glazes if you have access to a ball mill to grind them up small enough. In order to recycle fired pots, you need to divide the ceramics into unglazed or biscuit ware for use as grog in clay bodies and glazed ware and glass for re-use in glazes. Granby Workshops in Liverpool are one studio using 100% recycled ceramics from the pottery industry for their tableware.
7. Use waste materials such as wood ash from your wood burner or fireplace. This can be soaked in water, sieved then made into a glaze together with clay and feldspar. Wood ash acts as a flux and adds subtle colours from olive to bottle green. Other waste materials include ground sea shells and dust from quarries or marble workshops, all used as glaze fluxes. You can use small quantities of local clays as decorating slips and mixed into clay bodies, but if you want to dig larger amounts, you need to ask permission from the landowner.
8. Instead of firing in a gas kiln, you can achieve similar reduction glazes in an electric kiln by adding a reduction agent such as fine mesh silicon carbide to the glaze and an oxidising agent such as zinc oxide to mop up the excess carbon (you only need around 1% of the total dry glaze weight of each material). The silicon carbide breaks down above 1000°C into silicon and carbon and reacts with the oxygen in the glaze, changing the colours of iron oxide from amber yellow to celadon green and copper oxide from green to copper red. It is possible to achieve several classical Oriental glazes by this means, including Chun blue and celadon. You can find silicon carbide glaze recipes on glaze database glazy.org
Do you want to learn about glaze chemistry but don’t have the time to spend weeks on a course?
I have been working on a new online course on how to make your own glaze and what each material contributes. Learn how to add colouring oxides and combine different oxides in a colour blend. I’ve carefully constructed, edited and condensed quite a lot of content into a short glaze course. By the time you finish, you will have a good understanding of the principles of making a glaze and, knowing what each ingredient does, you will have some confidence when it comes to adjusting your glazes. You will also have gone through some key practical steps in making glazes and will have seen some ‘good practice’ which will ensure you get reliable, repeatable results.
What you will learn:
Glaze chemistry
1. The three main components of a glaze and what each material contributes to the glaze.
2. The difference between a glaze recipe and molecular formula and how it relates to glaze stability.
3. Glossy and matt glazes, adjusting glazes and correcting defects.
4. Adding colour, in the form of oxides and stains. Health and safety.
Practical session on how to make your own glaze and add colouring oxides.
Materials and preparation
You will need to make 15 test tiles, rectangular clay slabs around 6x4x0.5cm. You will need to fire the test tiles in a kiln. I prefer stoneware temperature 1250°C, cone 8, but you can use higher or lower firing temperatures and choose your own glaze base.
Who is the course for?
Beginners and intermediate potters will find this course useful, especially if you want to learn how to make your own glazes and understand what each material contributes.
Who is teaching the course?
Linda Bloomfield trained as a materials scientist and worked at Imperial College in London before having children and becoming a potter. She has written six books on glazes and tableware and teaches workshops on understanding glazes. The online course covers the same content as her weekend workshop.
How long does the course take?
The theory video takes half an hour to watch and is divided into four sections.
The practical session takes half an hour to watch and around two hours to complete the glaze tests yourself.
This year we are having a virtual open studio Artists Staying at Home. Painters, potters, printmakers and jewellers from Hammersmith, Chiswick and Shepherd’s Bush will be taking part.
I will be having a video tour of my studio on Instagram at 6pm BST on Friday 19th June and new work will become available for sale in my online shop.
My standard ware range is also available. I try to keep everything in stock except dinner sets, which are usually made to order.
I have been making new work for an installation at Somerset House as part of Collect, the international craft and design fair presented by the Crafts Council from 27th February to 1st March 2020. My installation will bring attention to the effects of global warming and pollution on lichens. The lichen crusts will become darker and fewer, eventually disappearing altogether. Lichens are indicators of clean air and are affected by sulphur dioxide and nitrous oxide from burning fossil fuels. If all the lichen disappeared from rocks and trees worldwide, global warming would increase significantly.
I made a number of glaze tests to give the effect of lichens on rocks. I like the crustose form of lichen; the white and yellow patches that grow on rocks and roofs. These are more pollution resistant than the green lichens that grow on trees. I applied the lichen glazes over matt grey glazes on closed forms representing basalt and limestone boulders and stromatolites, ancient fossilised mounds of blue-green algae, one of the first forms of life on earth that oxygenated our atmosphere.
Lichen-effect glaze testsTest plate with overlapping lichen glazes on a grey matt glaze.
I am looking forward to exhibiting at Collect. There are other makers exhibiting including Margo Selby, as well as international galleries Ting-Ying and Flow Gallery. There is also an exhibition next door on Mushrooms: The Art, Design and Future of Fungi.
Collect, 27th February- 1st March 2020, Somerset House, The Strand, London WC2R 1LA.